Introduction
This blog will walk you through the best and easiest way to make your strong shelves using material that can be easily accessed.
Shelves add extra storage to any area but can be especially useful in a shed or a basement where you may want to store away seasoning trinkets, fertilizers, tools, etc.
Remember no need to visit your local timber merchants, all the needed timber supplies mentioned in this blog can be found here
Materials Needed
The list of materials needed for this project is as follows;
- Upright Support: Timber 2x4 / 16” – You will need 18 pieces of timber at this measurement. It’s best to use kiln-dried timber for the best results.
- Shelf Cross-Support: Timber 2x4 / 21” – You will need 6 of these for each shelf you plan to make as the cross support.
- Shelf Rail: Timber 2x4 / 6-8ft – 6 of these pieces.
- Filler Pieces: Depends on the measurement of your shelf and how you plan to adjust it.
- Shelves: 4x8 ft Sheets of oriented strand board (but the size may change according to your measurements.)
- Long upright support: Timber 2x4 5ft – 3 of these will be used on the outer side of the shelf to secure it from the front.
- Screws – 1 box of deck screws with star head drive. You can also use 2.75” screws for a firmer grip.
Tools Required
List all the necessary tools required to build the storage shelf:
- Cordless Drill – Cordless drills reduce the safety risk and are easy to hire if you do not own one.
- Pencil or Pen – this will help you mark all work surfaces after measurements for ease.
- Hammer
- Tape Measure
- Speed Square
Building the Shelf Frame
Step 1 – Measure the space you are working with and decide how big you want the shelf to be. Cut your timber to size according to the size of the shelf you want. bare in mind the above measurements are for an 8 ft-long shelf.
Step 2 – Use the tracer so mark the measured lengths on the wood and the wall. This will make it easier for you to know the sizes when you assemble everything.
Step 3 – Mark the distance on the 6-8ft timber shelf rail that you want the 16” pieces to be. This will determine the strength of the shelf so the pieces need to be at equal lengths.
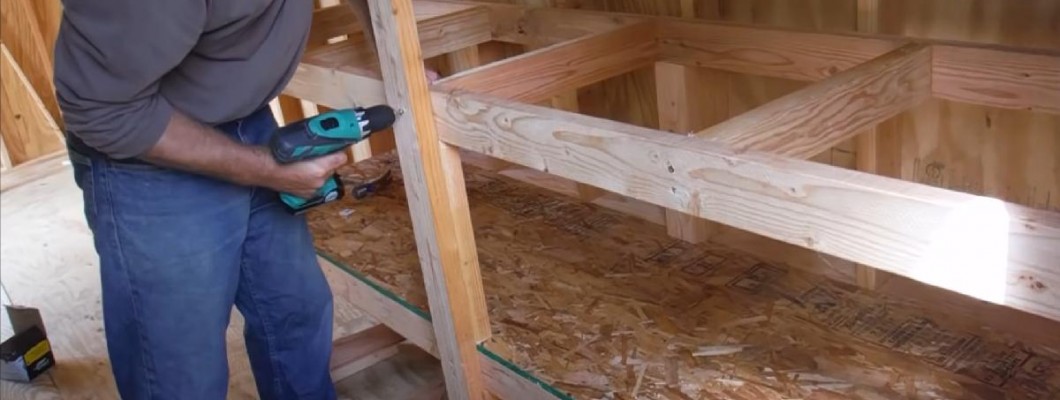
Step 4 – Add the 16” pieces to the middle of the 6-8ft pieces of wood where the markings have been added and screw them in from the middle. Make sure to secure the pieces in place on both sides. The result should look like a step ladder and this will be your starting structure. Repeat this process to create two more frames.
Step 5 – Fix your upright support to the wall where you want to add the shelf and secure them in place.
Step 6 – Attach one small upright support piece to one large upright support at the lower end. Make sure to do this for all three large upright supports.
Step 7 – Add the first main shelf structure on top of the upright supports on the wall and add the large upright support to the front. Make sure to place the structure on top of the attached small support so it can stand freely. Then use the drill and add screws to all the parts that need to be attached.
Step 8 – Add fillers to the back of the shelf against the wall. The sizes will vary according to the beams in your wall. This will give your shelf extra support; you will need to hammer these parts lightly into place before nailing them in.
Step 9 - If you’ve measured correctly according to the area that you’re adding the shelf too, then you can just be able to slide the OSB on top of the first main shelf structure.
Step 10 – Use the small upright support in the same areas but on top of the first main shelf structure. Secure the support in place making space for the second main structure to lay on top. Once the second main structure goes on, add screws to secure it in place. Then repeat the step with the third and final structure.
Finishing Touches
You can sand down the rough edges of the shelf to prevent splinters and add varnish or paint to your shelf to give it a fresh and nicer look. wood stain is not essential for inside timber structures that stay dry but it is an optional extra if you want added longevity.
Conclusion
The thing to remember when doing this is that the sizes given here are only a baseline, you need to measure according to the area you will be adding the shelf to and how long you want the shelf to be.
If you decide to make your own shelf, let us know about it and tag us in your progress on social media!
Ensure that you choose the right timber merchants in Nottingham with Frank Key you are coved.


