")


Building the roof of your man cave is an important step to ensuring that the building is watertight and also that it keeps warm in the winter and cool in the summer. This is because the roof is responsible for a large amount (usually around 25%) of the heat loss in a building because heat rises.
Things to consider before starting your roof build/design:
- How high does your planning permission allow you to build
- How much weight your roof materials will be combined
- How well insulated do you need your room
- The area in which your mancave is built
- How much ceiling space you need
- Do you have a ladder?
Roof options
Remember when building your roof you must have a slight slant to prevent water from puddling on your roof as in the long term this causes damage to your roof and is one of the primary causes of roof collapses.
If you don't want a flat roof remember that you need planning permission for the extra height that is required from a traditional Gable roof/ pitched roof. Also, flat roofs are much easier and cheaper to build than any other design, which is why we recommend a flat roof for your build.
Roof insulation options
If you don't go with a flat roof design then this section is not useful to you however if you do go with the flat roof design you have two main options that you can go with for insulation.
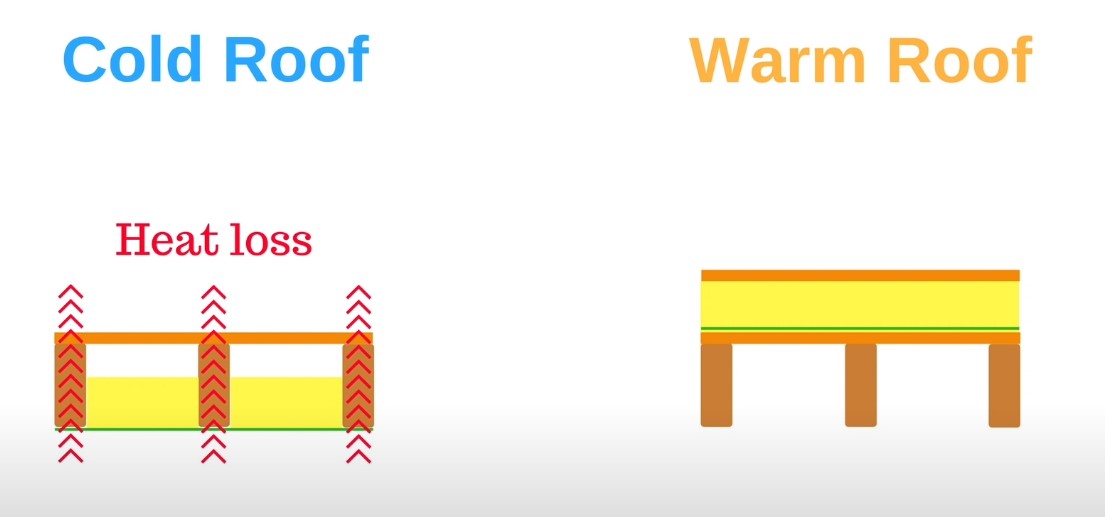
Option 1: Cold Roof
The first option is a cold roof, this is where the insulation is placed in between the roof timber joists with a single deck on top of the joists.
This option is thinner and allows your building to be slightly shorter however it does sacrifices some headroom inside. A cold roof also requires fewer materials and reduces the weight load on your roof, this is because only one plywood deck is needed for the cold roof.
The downsides to a cold roof are that it requires a lot of work to cut all the insulation a fit it in between the joists, if you have already done this for the floor toy will know how difficult it can be. Also, a cold roof is not as effective at insulating because the timber joists make an uninsulated bridge for heat to escape from.
Option 2: Warm Roof
The second option is a warm roof, this is where your insulation is placed on top of your joists with a plywood deck below the insulation and another deck on top of it. This design has lots of benefits, firstly it requires a lot less cutting as the full PIR insulation sheets can be placed on top of the roof with cutting only required around the edges, this saves lots of time and effort.
Secondly, the vapour barrier that might be required for your build will be a lot easier to install. Warm roof insulation is more effective and efficient than cold roof insulation because there is no heat lost through the timber joist and because a large amount of heat is lost through the roof of a building so this is an important thing to consider.
And finally, the extra headspace that warm roofs allow for makes it a lot easier to install the electrics such as the lights and any other electric appliances that you want.
Once you know what type of insulation you are going for you need to ensure that the slope is correct on the roof, it is worth checking the minimum slope requirements for your flat roof waterproof material.
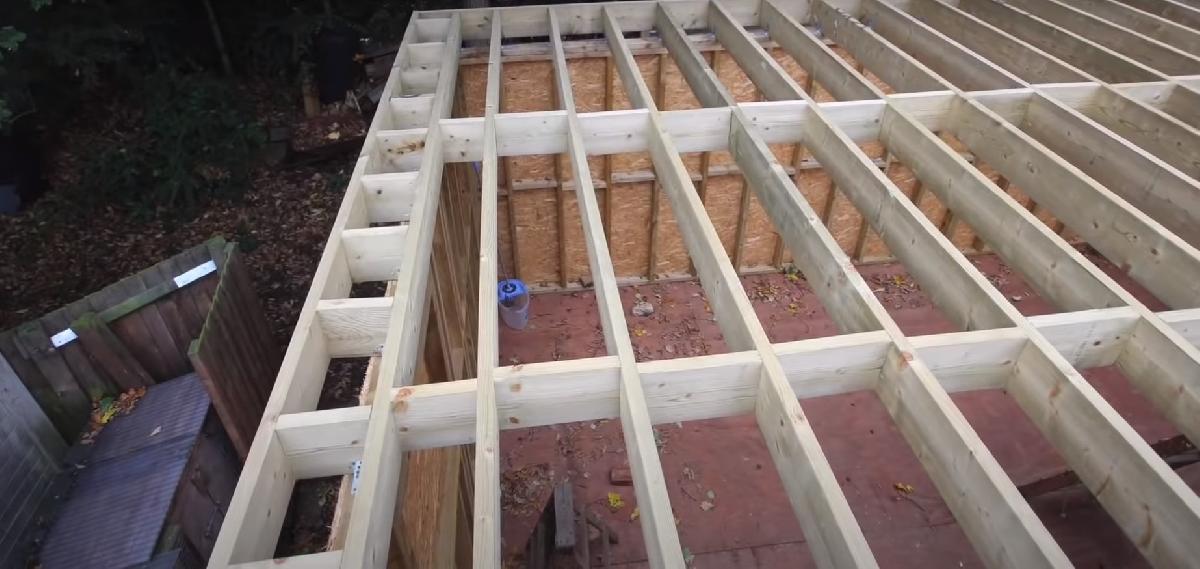
Fixing the roof joists to the top of your walls
This section will fully secure the structure of the building and when the frame of the roof is completed you can take down the bracing discussed in the previous mancave episode.
Things to consider:
- Ensure that you have a suitable joist thickness for the length of the roof and the space in between the joists
- Check a flat roof joist table to check what thickness of timber you need
- If the length of your building wall to wall is more than 2.5 meters then you will need cross brace noggins in between the roof joists in the middle
- Do you need two people for this job?
Once you have the design that best suits your build you can start laying your selected joists across the top of your walls, make sure that you mark where all the joists are going to be placed as you lay them out as this will help you to be precise as you lay the joists across the walls. For using your nails and screws ensure that you use the correct length for the size of the joist, it is also recommended that you use heavy-duty brackets, these help stop the nails you use from working loose.
It is recommended that you have a roof overhang on all sides of the building as this helps the building be more watertight. Because of this, you must make sure that you measure the overhang of each joist before you fix it to the top of the wall to ensure you have a stright finish along the outside of the roof.
When fixing the joists to the walls it is recommended that you use 30mm twist nails for fixing the bracket to the timber to secure the bracket, then to secure the roof timber to the walls use 100mm nails and hammer them in diagonally so they go through both pieces of timber.
Once these are in place you will need to fit a joist around the edge of the roof with the larger side facing outwards, then use 2 x 100mm screws and 2 x 100mm nails to fix this piece of timber to each roof joist.

Congratulations! Once this is completed you should have the full structure for your man cave completed. But don't get too excited as there are still some ways to go before you fully finish your build.
Building the roof insulation layer
This next step will depend on what roof insulation style you decide to go with, we are going to cover a warm roof as it is generally considered as the better option in most cases.
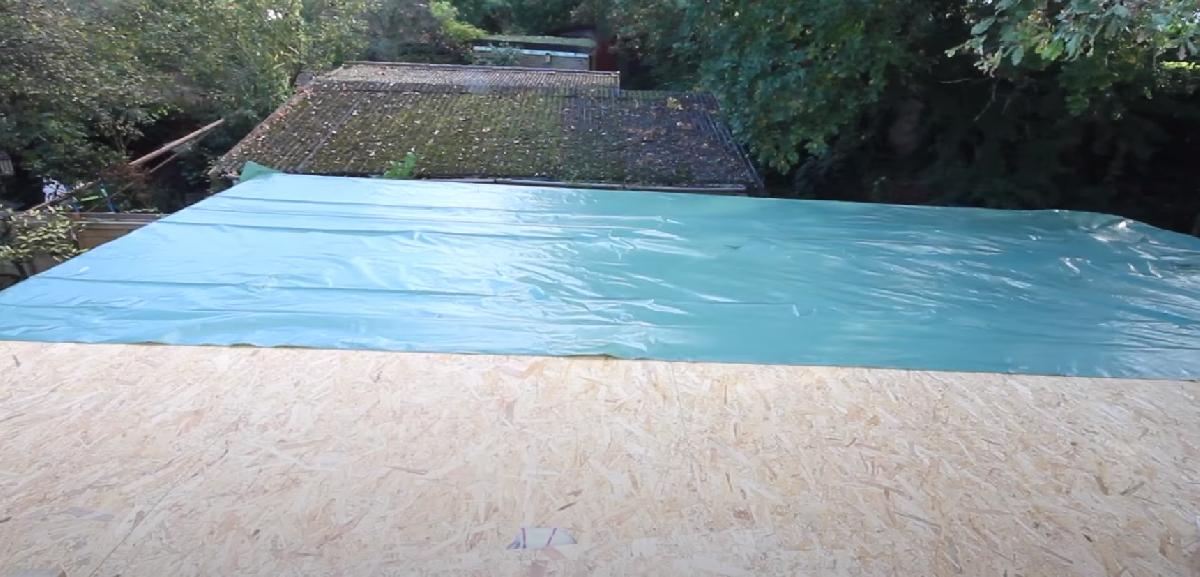
The first step is to lay the first plywood deck on top of the joists, a circular saw is useful to have for this step or if you cant get one use a hand saw.
When fixing down the plywood use 50mm screws every 200mm along the roof timber joists and leave a 3mm gap between each plywood board to allow for wood expansion as temperature change. Next, you want to cut around the edged of the roof the ensure tha\t the ply deck is flush with the timber roof rim joist that runs around the edge of the roof.
Laying The Vapour Barrier
The next step is to lay the vapour barrier down, remember before you start you must have fully fixed the first plywood deck down and sweep all the sawdust and bit off the deck. as you lay down each sheet pull them tight and nail down each corner then on the next sheet overlap the last one slightly and apply joint tape along the edge to stick them together. Repeat this process until your vapour barrier covers the full roof, don't worry if there is an overhang on any of the ends just yet.
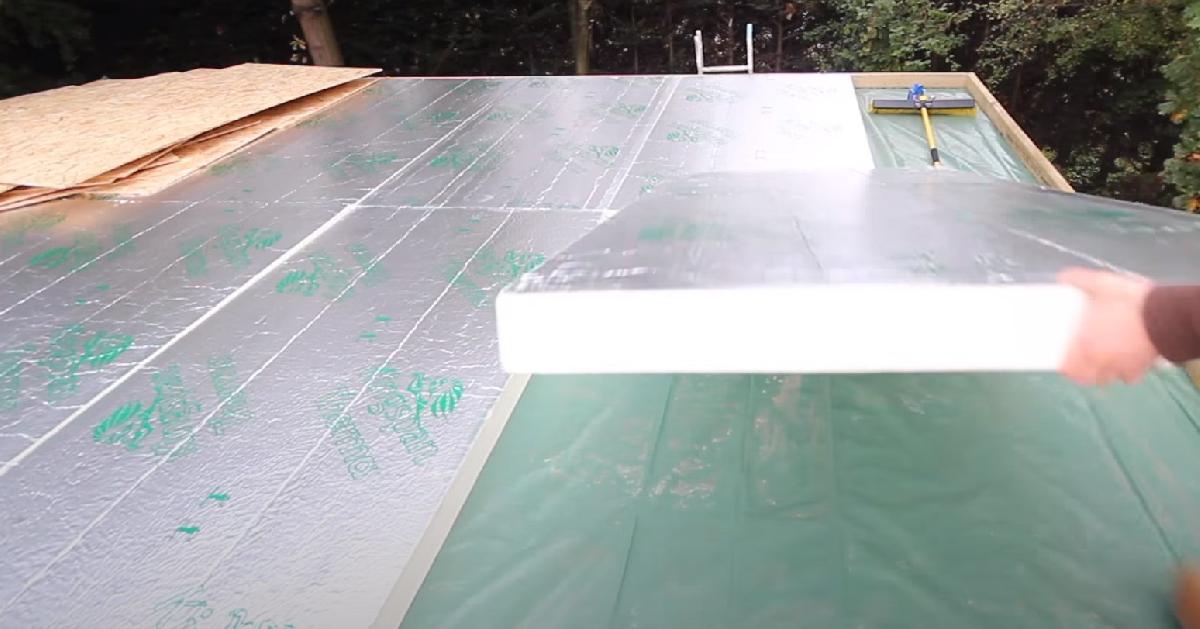
Laying the Insulation
First, you want enough timber to run across the edge of the insulation and ensure that this timber is the same width as the PIR insulation you are using for the roof. Then with this timber fix it along the border of the roof using 100mm screws on both sides that are fitted diagonally through the border timber into the plywood deck below. Repeat this across all sides until you have a full border that is the same depth as the insulation you are about to fit.
Fitting the PIR insulation is easier on a warm roof as not much cutting is required to fill the border with the insulation, remember cutting will still need to be done across at least 2 sides of the roof to ensure all the insulation fits flush around the edges. This step is important to get right as any gaps will affect the buildings insulation properties.
Fitting The Top Deck And Waterproof layer
Fit the final deck the same as the first deck was applied however this one will need to be nailed into the border timber as well as through the PIR insulation into the plywood deck below it. Next, apply your roof material and ensure that you check what precautions you need to take while applying it as every different material has uses different fixings and adhesives.
The most popular option is roofing felt or rubber roofing and if you decide you want something fancier then it is still recommended that you use this underneath whatever you choose as an added layer of waterproofing. When fixing this down ensure you only use nails as screws can twist and tear the material.
Once this is all fitted your roof is completed and is fully waterproof, you now have a decently insulated building and most of the heavy work is done, the last thing now is to fit the doors and windows and do some finishing touches and optional extras.
Click the following link for episode 4: - Building the walls
Click the following link for episode 6: - Fitting the windows and doors